Showing posts with label birthday. Show all posts

Thursday, March 29, 2012

Hubby's birthday at the Cadieux Cafe

I wanted to share a few photos from hubby's birthday. A big group of friends gathered together to celebrate at the Cadieux Cafe in Detroit. It's a family owned Belgian bar and is so much fun! A couple years ago it was even featured on The Travel Channels "Anthony Bordains No Reservations". By the way, if you're ever in the vicinity of Detroit...wow, we have some really good restaurants in the area!


We started with dinner, including their specialty - steamed mussels! Oh my, these are aMAZing! Ours were served in a lemon flavored broth, but we also sampled friends garlic flavored bowl. You really can't go wrong either way.


I enjoyed a bottle of Frambois Lambic beer with my dinner. If you have never had Frambois, you don't know what you are missing. It's a sweet, raspberry flavored beer; dark red with a bright pink foam head. Delish, and perfect on a hot summer day. You can also find peach and cherry Lambic, but hands down my favorite is Frambois.


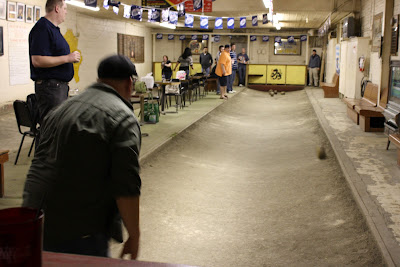
After we listened to some great music and stuffed ourselves fit to burst (and then packed the rest of the mussels to take home) we headed to the side room for the highlight of the evening - a couple hours of Feather Bowling. That's right, Feather Bowling.


It's like Bocci ball, curling, bowling all in one. At each end of the curved clay lanes is a pigeon feather, right in the ground. Then you take wooden "balls" which really look like stones used in Curling, and roll them down the lane. The goal is to get as many of your teams balls on or near the feather as possible. The other team does the same and you try to knock each others balls out of the way as you go.


They might not be asking me to join a league anytime soon, but I held my own enough to help our team stay undefeated for the night! :)


The Cadieux Cafe is the only place in America with a Feather Bowling league. It's really popular, so you have to reserve a lane weeks, even months ahead.


We had such a blast! I just wish it was closer to our house, so we could go more often! Happy birthday to my hubby! :)


By the way, sorry for the dark and blurry photos...I really need to get better at indoor pictures without a flash. Practise, practise, practise!

Wednesday, February 29, 2012

Rainbow Birthday!

Just wanted to share a couple of pics from Lil A;s birthday party...can anyone guess the theme? It's oh so subtle! :)

RAINBOWS!
This is a beautiful painting that she created for the party!


Most of the decorations were in the dining room. We had quite a yummy spread!


We had party popcorn, using this recipe! I almost didn't get a picture before it was all gone...can you believe that whole bowl was filled?!? The picture isn't too great and doesn't do justice to how yummy it was, for those who like a bit of salty and sweet. I also had some small popcorn boxes so people could fill it up and enjoy the popcorn wherever they were sitting - big hit! I found the popcorn boxes at Michaels a while ago.


We had a Candy Bar! The guests could put some candy of their choice in the little polks dotted boxes. The jars in front were found at my local Meijer for less than $4.00 each. The rest of the jars were already in my stash and come from IKEA. The milkglass bowl came from a local thrift store.


The birthday girl in all her Rainbow glory!


The birthday cake! Pretty simple on the outside...


The big reveal - a Rainbow cake! Found the inspiration here!


It was a very long day, but she was so happy that it was completely worth all the work. I can't wait for the next birthday, when we can have just as much fun as we did this weekend!
Happy birthday baby girl!

Sunday, February 26, 2012

Birthday card

Here is the card I made for my daughter's 5th birthday. I had sooo much fun coloring this digi stamp from Saturated Canary on Etsy. She's called Ellie's Birthday. Isn't she cute? :)


Copics Used
Skin: E000, E00, E01, R20
Hair: E31, E32, E34, Y17
Shirt, Socks, Hat: B00, R27, V06, YR08, Y17, B05, G07
Skirt: B91, B93, B95
Boots: C3, C5, C7, C9
Balloons: B00, B05, Y11, Y17
Highlights: AtYou Spica, Clear


We had a wonderful party for her surrounded by our family. I'll share pictures soon!

Happy Birthday Baby Girl!

My beautiful daughter just turned 5...how is that possible? Five years ago, this was the perfect little face I couldn't stop staring at. 8lb, 14oz of perfection.


Today, this is the beautiful little person I am blessed to be a mother to. She is passionate, funny, strong-willed, courageous, stubborn, sweet and loving. No matter what she does in her life I know she will do it with every ounce of her being...she has never done anything halfway. She is an amazing little person, and I can't imagine my life without her.


Happy birthday munchkin! I love you SO much. I love you forever.

Saturday, August 6, 2011

Happy Birthday card

I found a tutorial on YouTube by SplitcoastStampers on the Embedded Embossing technique. I was intrigued so I gave it a try. All in all it's a fun technique, but for the work involved I think I would rather stick to stamping my images and then covering the entire image in clear embossing powder. I felt there was really no difference in the effect and found that I lost some of the crispness of the stamped image. Once I stamped over the clear and used black powder, I found that the image started to spread as the black powder melted. I noticed it in both the flowers and especially in the sentiment.
Here's the card:


I started with white cardstock and used Distress inks (Wild Honey, Dried Marigold, Barn Door) to create a sunset/sunrise effect. I put two layers of clear embossing powder on the card and once cooled stamped the flower (Stampin' Up) and sentiment (Ali Edwards/Technique Tuesday) with VersaMark. I used black detail embossing powder and heated it. At this point I lost the fine lines of the flower stems and sentiment. I have to admit its really cool to watch the black sink into the clear.


I wanted to machine stitch around the image with black thread so off I ran to my sewing machine. Lesson learned: my sewing machine does NOT like embossing. Instead of sewing it gummed up in the embossing and nearly ended up sawing through the bottom 1/4" of the card. Ooops! So I had to hide it. Ribbon would be too wide, so I dug through my collection of fibers and found this one. I wanted it to be secure along the length of the card but also discovered that Tombo Mono glue didn't really want to stick the fiber and embossed surface together so I ran my tape runner in spots on the fiber and finally had some success. For a little extra something I used my Tim Holtz Mini Attacher and stapled the ends of the fiber.
Once all of that was done, I used some Basic Grey paper on the front of my card and popped the embossed image up with dimensionals. Whew! Crafting is an adventure!
I think if I try this again I will stamp everything first and switch to UTEE for more depth. Simpler technique, but I think I would like the effect more.
On a side note, I have a strong desire to try some embroidery. I used to cross stitch as a kid, but I don't even know where my floss has ended up now, years later. I want to try something like the pillow I made from my kids handprints (I have a video up on YouTube), perhaps using my kids drawings as the pattern. I saw something like this in the current issue of Create With Me by Stampinton (I totally LOVE this publication!). I'll have to dig through their sketchbooks for something. :) I've been looking through YT videos (naturally) and Google for ideas. We'll see.


Wednesday, April 20, 2011

Birthday card!

Hi everyone! Just a quick post...I meant to post a picture of this card before but in the transition from my old blog to new I didn't have a chance. I made this card for my hubby following a tutorial by Kristina Werner (starofmay on YouTube). It takes a little time setting up the rays and cutting them out, but nothing longer than the other paper piecing projects popping up all over YouTube lately. The paper collection is by Basic Grey and has a decidedly masculine feel. The cardstock is Kraft by Stampin Up (I'm still going through my stash and haven't picked up the new Crumb Cake color). My hubby wouldn't be thrilled with flowers or bling, so the only embellishment I used was button (also by Basic Grey) with a bit of embroidery floss used to tie a knot. I then spelled out the sentiment using black letter stickers and added some black stitching lines around the card. Very simple, but I loved how it turned out.

I did work on some more Easter decorations last night but havent finished yet. Hopefully I'll finish it tonight and be able to post some pics. For now, it's off to work on another grey, drizzly April morning. :)